How to build a gingerbread computer
Introduction
Recipe, Ingredients and Accessories
Graphic card
CPU cooler
RAM memory
Mainboard
Summary
|
How to build a gingerbread computer |
|
 |
 |
Christmas is just round the corner. For some it is a chance to relax with friends and relatives and retreat from the every day hectic work pace. A common family tradition is Christmas baking and most of us have probably taken part in it at least once, with a more or less successful result. Personally, I’m not a big fan of the whole Christmas baking thing, but since my girlfriend loves it I usually end up doing it anyway.
This year a new idea popped into my head when baking the annual ingerbread house. How about doing something fun and different? Thoughts swirled in my head for a moment and eventually formed a peculiar idea: “Why not build a gingerbread computer? No, get a hold of yourself. This is just too geeky; having computers as a hobby isn't enough but now you'll intrude on the traditional gingerbread house building.” I looked in the mirror for a moment and thought: "Has it really gone that far?" A fraction of a second passed before the answer came: “This is just too fun to miss out this challenge. Screw Christmas traditions and on with the computer “nerdiness”; let's build a gingerbread PC!”
 |
In the following text you will take part of the result, from idea to realization. The Gingerbread PC will be published in two parts. The first part of this article focuses on building the processor, heatsink, memory, graphics card and the mainboard. In the second part we will continue with the case, power supply, CD/DVD-player and the harddrive.
Recipe, Ingredients and Accessories
To make a gingerbread PC you will need a recipe, some ingredients and a few tools. We will therefore go through the list of essentials for baking a gingerbread PC.
 |
 |
Among the ingredients there is no fancy stuff. Most of it can be found in a fairly well equipped kitchen. Those of you living at home ought to find the stuff needed in your mom’s baking cupboard. ;)
 |
The following tools may come in handy when baking:
A somewhat odd but very handy tool, that might raise an eyebrow or two, is the pizza slicer. It makes cutting a whole lot easier. About the glue, on the contrary to the wood glue on the photo, super glue is preferable. Regular wood glue will of course work, but it takes longer to harden. A third and more edible solution is melted sugar. This is made by melting a few decilitres of sugar in the oven or in a frying pan. Then dip the edges of the pieces you want to glue together in the melted sugar and press the pieces together.
The first component that we are going to bake is the graphics card. It's relatively easy; just take a lump of dough, place it on some baking paper and roll it until it is flat and a few millimetres thick and covering a surface of adequate proportions. After that, you place a previously completed model on the dough and cut out the motive. I used the hard cover of an A4 paper notebook for the model. Be careful, because the dough tends to stick to the model and is easily deformed. To avoid this, you can rub some flower onto the model to avoid that the dough becomes too sticky. A knife is then used when separating the dough from the model. It's initially one of the more difficult tasks and may result in a few unsuccessful attempts.
 |
 |
 |
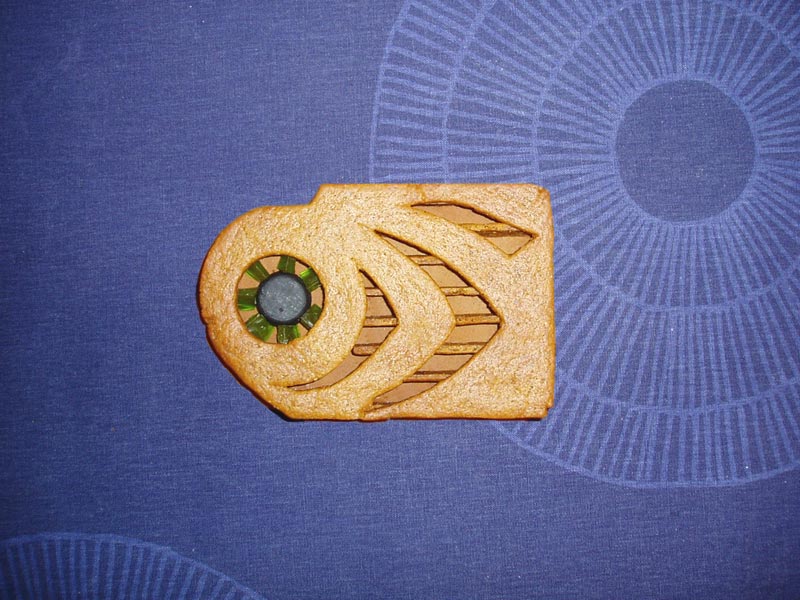 |
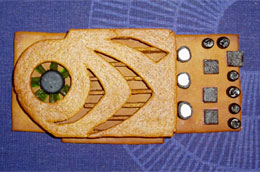
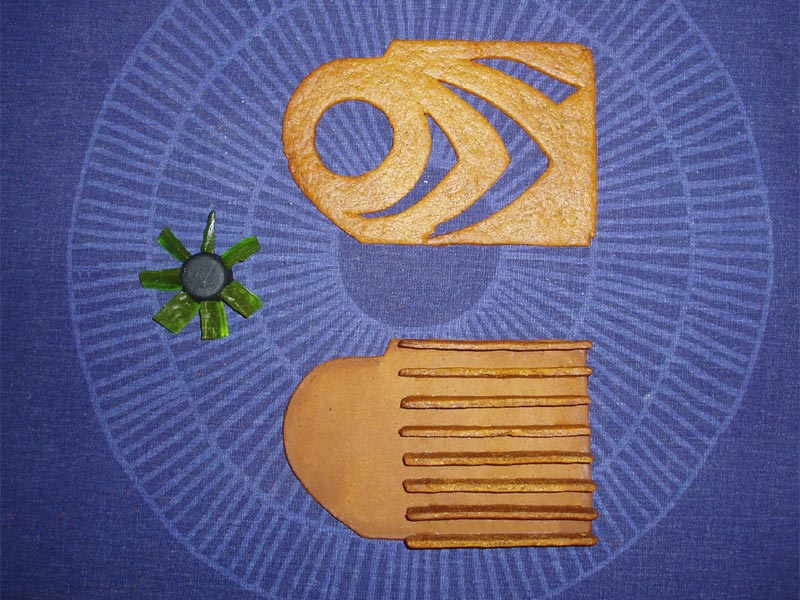
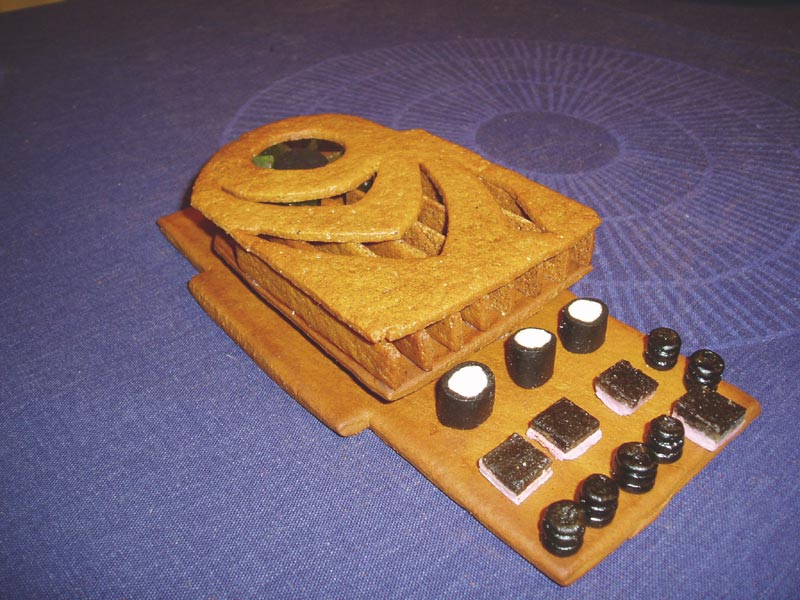
The left photo shows the different components of the cooling unit. The heatsinks have already been glued to the bottom plate and the fan is made in advance. The fan consists of a round "Bassett" candy, with the green fins cut into slim pieces from a green candy. The right photo shows the cooling unit after it’s been assembled and glued onto the bottom gingerbread plate.
 |
 |
 |
 |
 |
Now it's time to move onto building a gingerbread heatsink for the candy processing unit (CPU). The procedure is the same as before, that is make a model, flatten the dough, put the model in place, cut it out etc. Even the fan is built similarly to the one on the graphics card. The difference is the size of the bits of candy used, and that you need two round basset pieces.
 |
 |
 |
 |
 |
 |
 |
 |
 |
 |
 |
 |
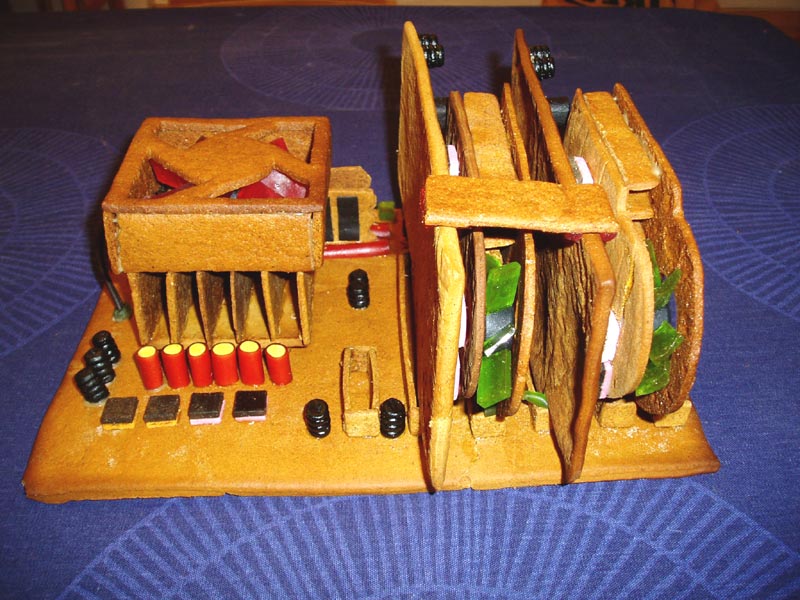
The main difficulty with this project is that the gingerbread tends to alter it's shape in the oven, and it tends to be very fragile. This has lead to a few mishaps, though mainly with the larger parts. The issue with the fragility led me to change dough to a regular one that doesn't change shape so quickly in the oven. We will focus more on different tips and tricks for baking in the next part of the article.
 |
 |
 |
 |
In the next part of the gingerbread PC article we will bake a case, power supply, cd/dvd-player and a harddrive. We will also make the common cables found inside a pc. Stay tuned for the next part.
 |
 |
| |
|
 Print this article